Quick Start Guide: Setting Up Your First Automation
Get started with Automatio in just a few steps! This guide walks you through creating and running your first automation using the Automatio Chrome Extension.
Watch the Quick Start Video Guide
Get started quickly by watching this step-by-step video guide. It walks you through creating your first automation, from setting up the Automatio Chrome Extension to running your bot and reviewing the results.
Step 1: Open the Automatio Chrome Extension
- Navigate to the website you want to automate. In this example, we’ll use the Hacker News homepage (https://news.ycombinator.com).
- Click on the Automatio icon in your browser toolbar to open the extension.
Haven’t installed the extension yet? Check out our guide on Installing the Chrome Extension.
The Automatio extension will open, and the URL of the current page will automatically be placed in the Start Action.
-5b7ad701e32d2c830dd6685c38b4e6b3.png)
Step 2: Build Your Automation Workflow
In this quick example, we’ll demonstrate how to scrape article titles and URLs from the Hacker News homepage. Here’s how to create a basic workflow:
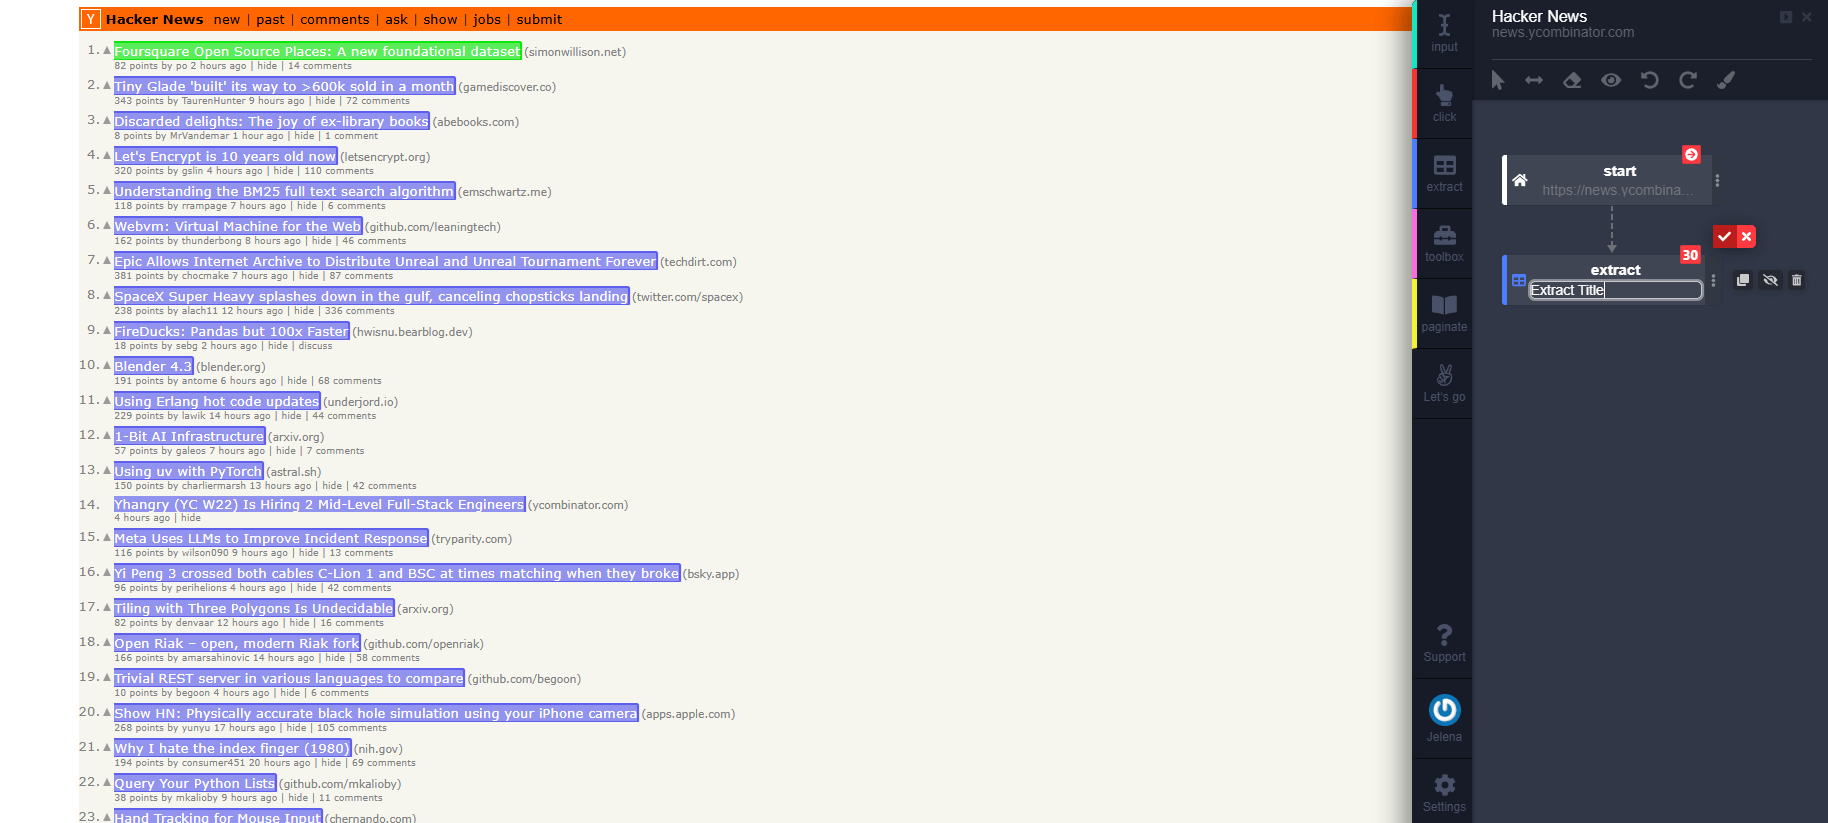
1. Extract Article Titles
- Click the Extract action from the sidebar in the Automatio extension.
- Hover over the title of an article on the page. The element will highlight in yellow.
- Click to select it, confirming the selection with a green highlight.
- By default, Automatio will extract the text of the selected element.
- Name the action (e.g., "Extract Title") to better organize your workflow.
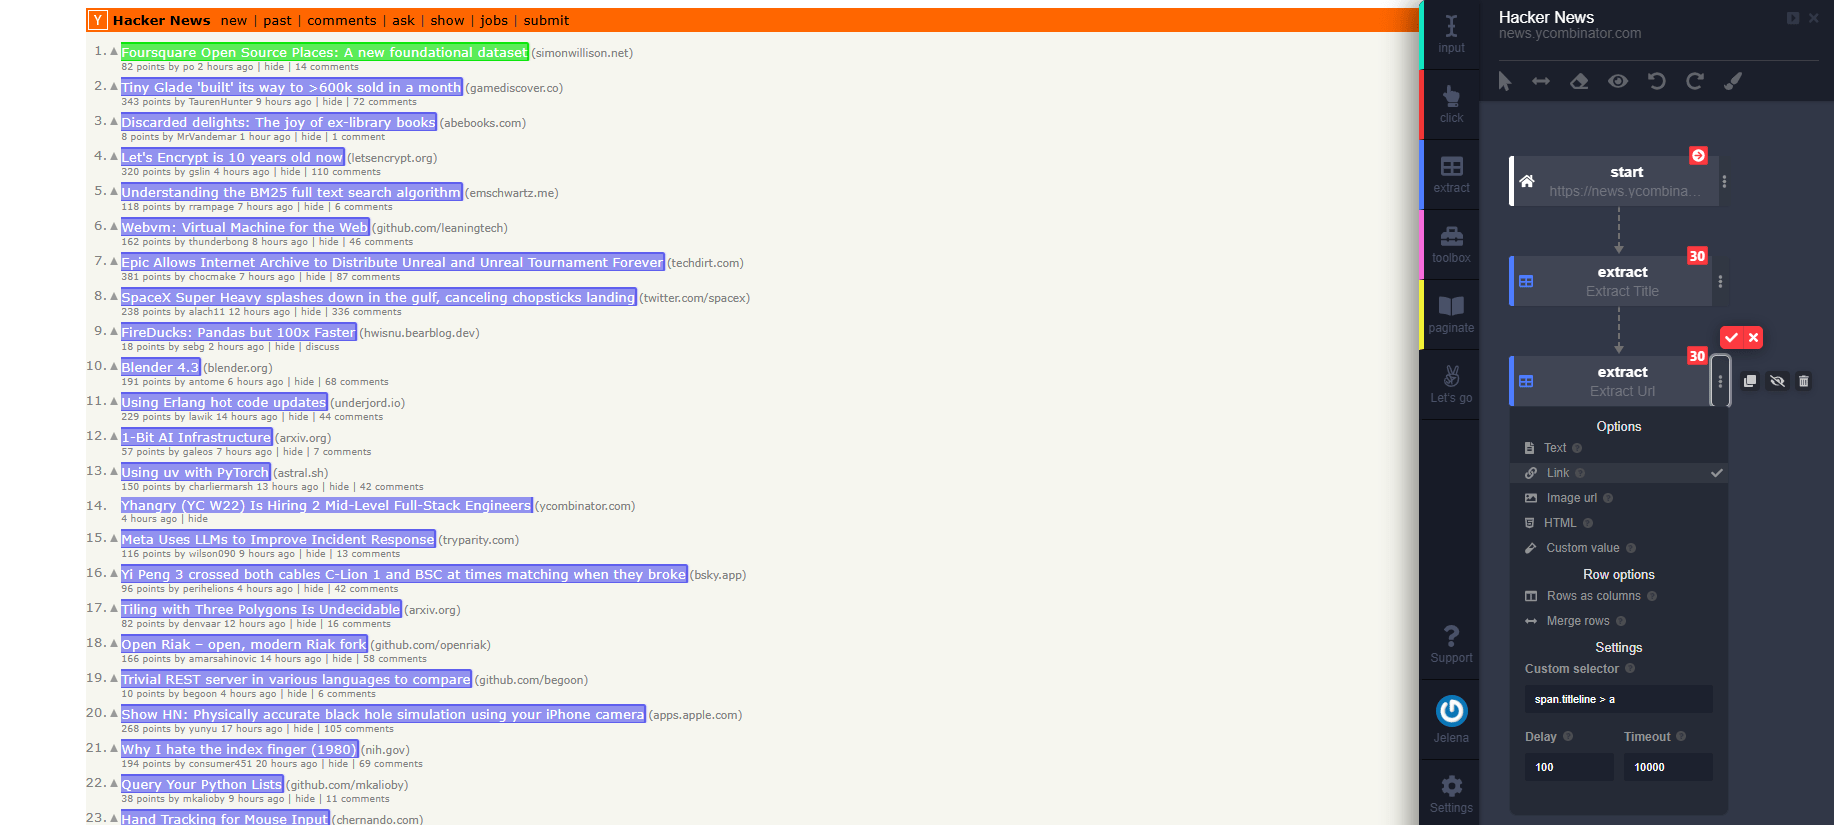
2. Extract Article URLs
- Add another Extract action.
- Hover over the link associated with the same article.
- Click to select the link, confirming the selection with a green highlight.
- Open the Options Panel by clicking the three dots next to the action and select the Link option to extract the URL.
- Name the action (e.g., "Extract URL").
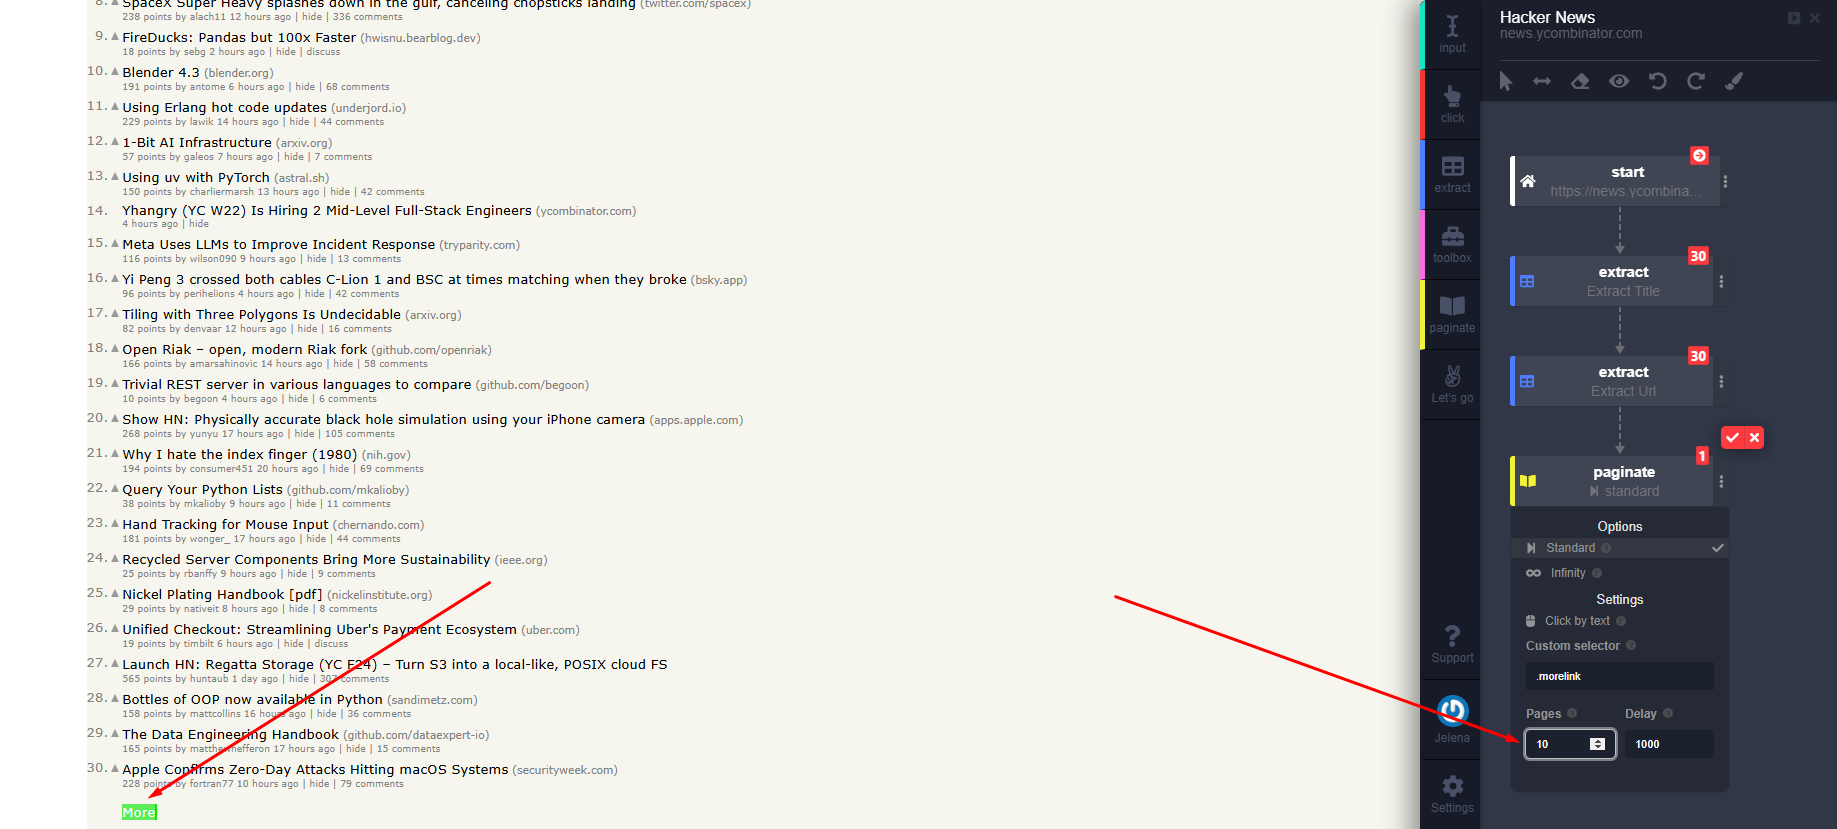
3. Paginate (Optional)
- To scrape multiple pages, add a Paginate action.
- Use the selector tool to click on the "More" button link at the bottom of the page.
- Open the Options Panel (via the three dots) and set the number of pages to scrape in the Pages field.
- Drag the looping point to the first extraction action (e.g., "Extract Title") to repeat it for each page.
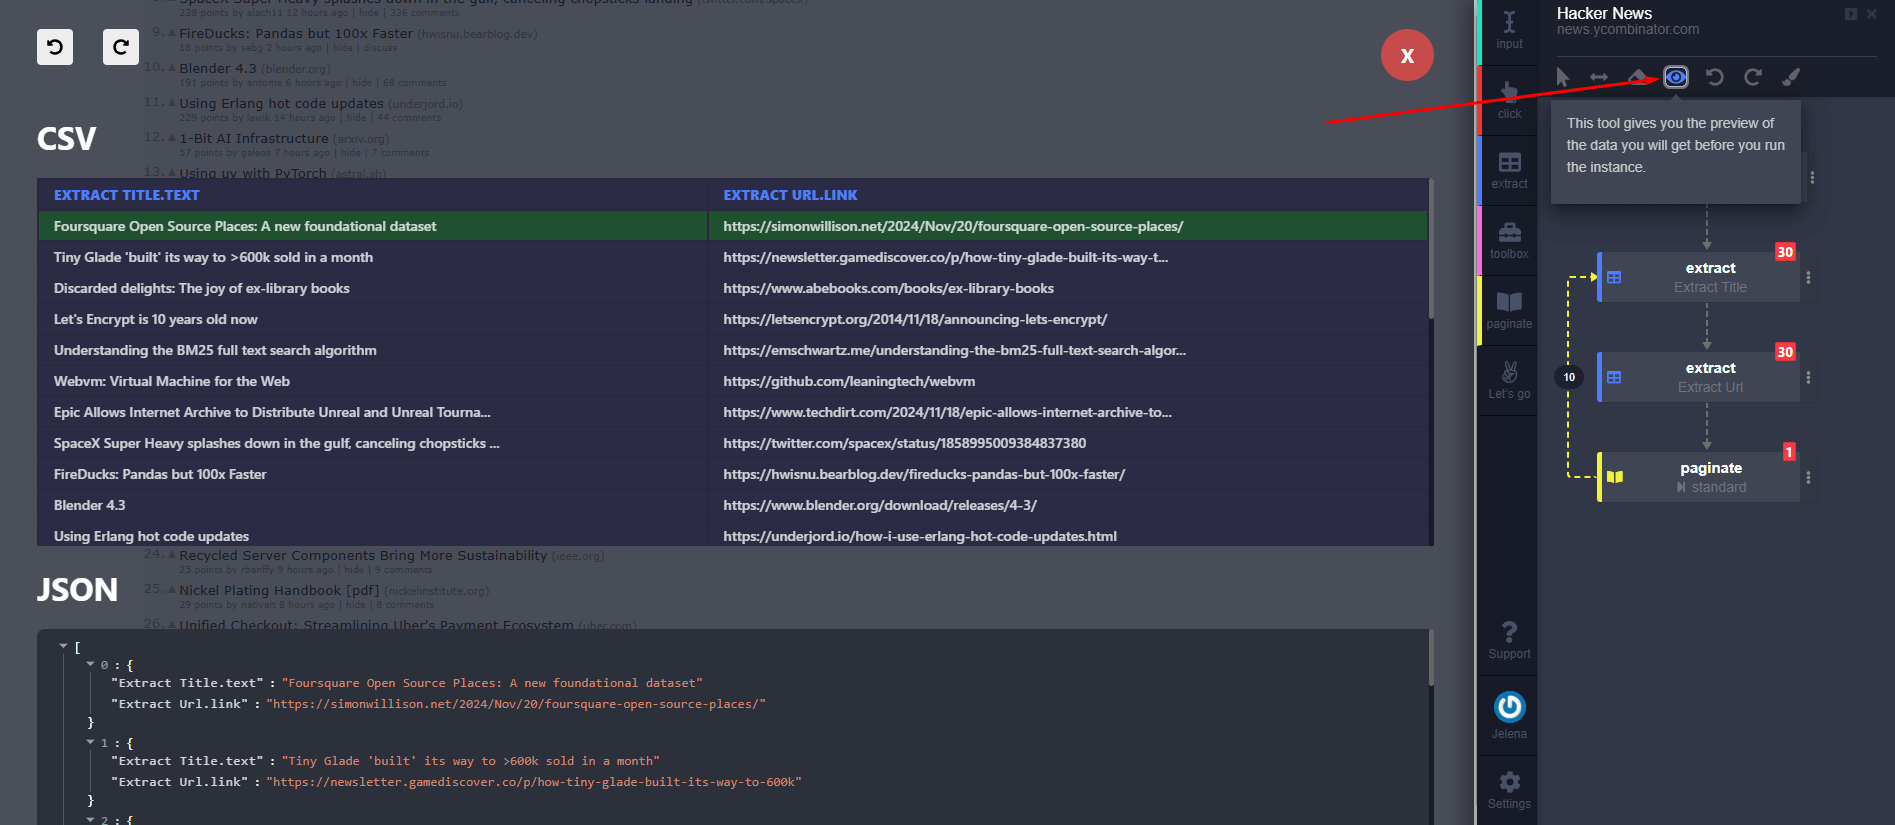
Step 3: Preview Your Data
- Click the eye icon in the top toolbar to open the Preview Table.
- Review a sample of the extracted data in CSV or JSON format to ensure everything is correct.
Step 4: Create and Run Your Bot
- Once your action flow is set up:
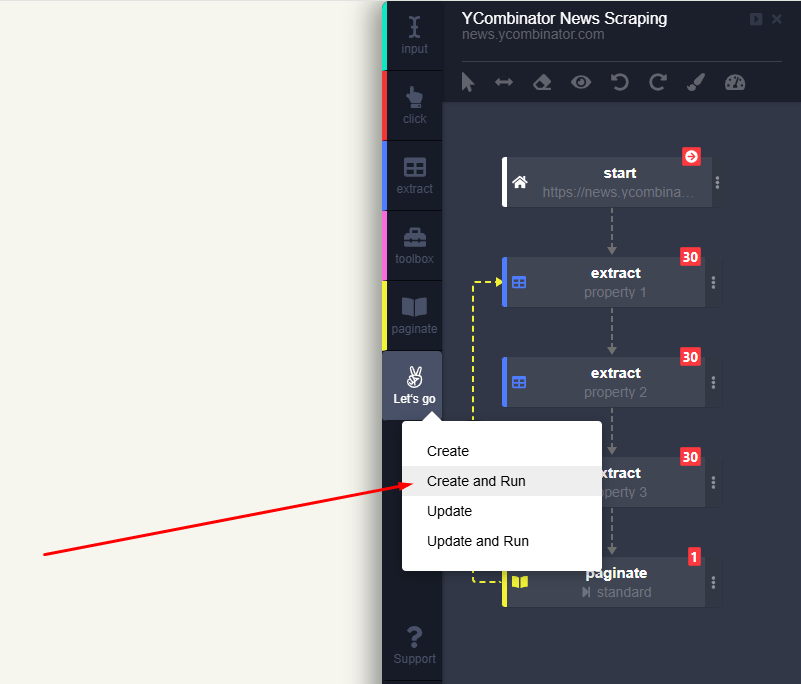
- Click Let’s Go in the main sidebar.
- Select Create and Run to execute your bot.
- Automatio will create an instance of your bot, which will appear in the dashboard.
- Monitor the progress and access results from the Automatio Dashboard.
Tips for Your First Automation
- Start with a Simple Task: Begin with basic actions, like extracting a small set of data or clicking a single button.
- Use the Preview Tool: Always preview your data with the eye icon before running the bot.
- Explore Action Options: Experiment with advanced options like pagination or dynamic inputs as you gain confidence.
What’s Next?
Congratulations! You’ve set up and run your first automation. Ready to tackle more complex workflows? Check out additional tutorials in our Knowledge Base for advanced features like multi-page scraping, Google Sheets integration, and more.