Creating and Managing Lists
Learn how to create, organize, and manage lists of URLs in Automatio. Whether you're setting up bulk scraping tasks or preparing for automated workflows, Lists help you efficiently store and reuse groups of URLs, streamlining your automation process.
Creating a New List
To create a new list, follow these steps:
- Click the Create New List button.
- In the list creation view, you’ll have the following options:
- Drag and Drop CSV File: Upload a CSV file containing URLs. Automatio will automatically populate the list with the links from the file.
- Add Title: Give your list a descriptive title to easily identify it later.
- Manual Input: Manually type or paste URLs into the provided field. You can optionally choose whether to include headers.
- Once you’ve added your URLs, click Save Links to save the list. It will now be available for use in your instances.
Creating_and_Managing_Lists.webm
Lists View
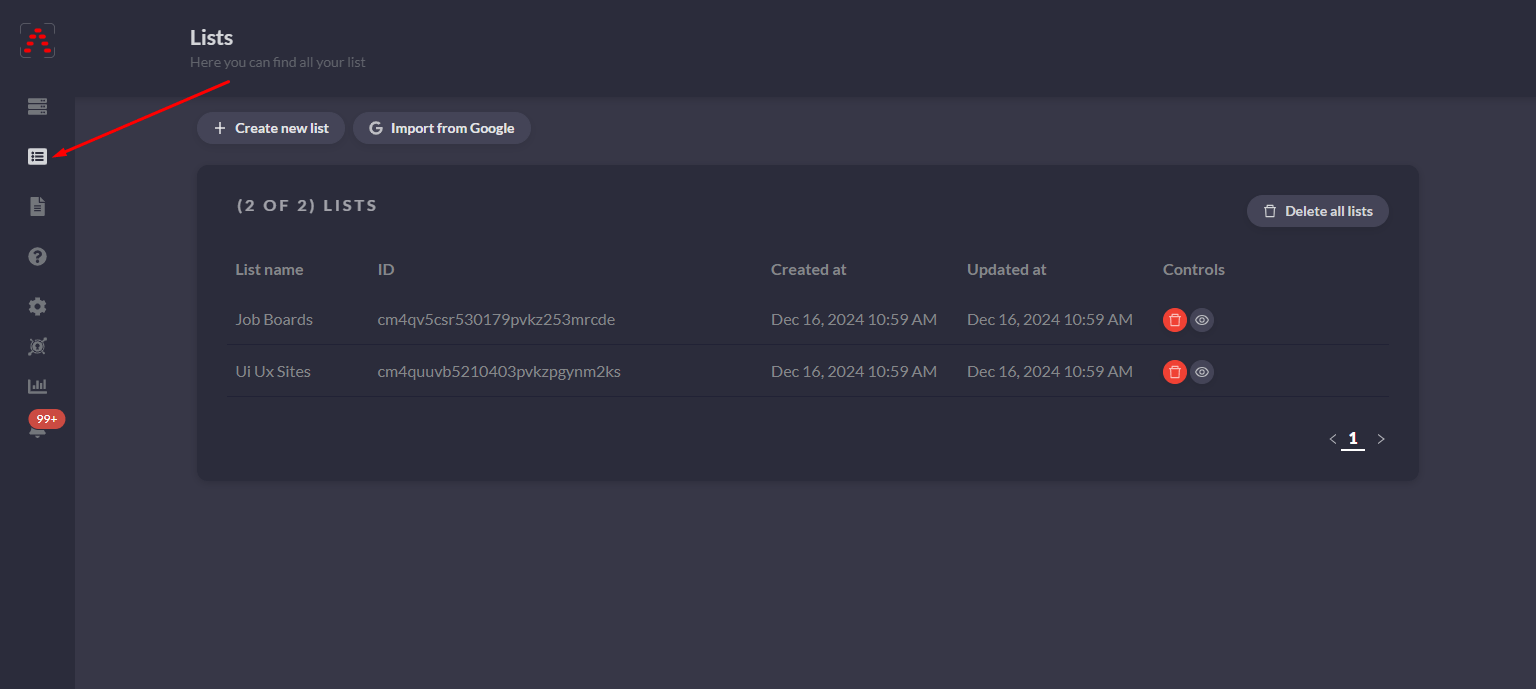
Once your lists are created, manage them easily from the Lists section in the sidebar. The table view displays all your lists, showing:
- List Name: The title for easy identification.
- ID: A unique identifier for the list.
- Created At: The date the list was created.
- Updated At: The most recent modification date.
Each list includes controls for:
- Preview: View and inspect the URLs within the list.
- Delete: Permanently remove the list.
At the top of the Lists page, you’ll also find options to create or import new lists.

Viewing and Editing a List
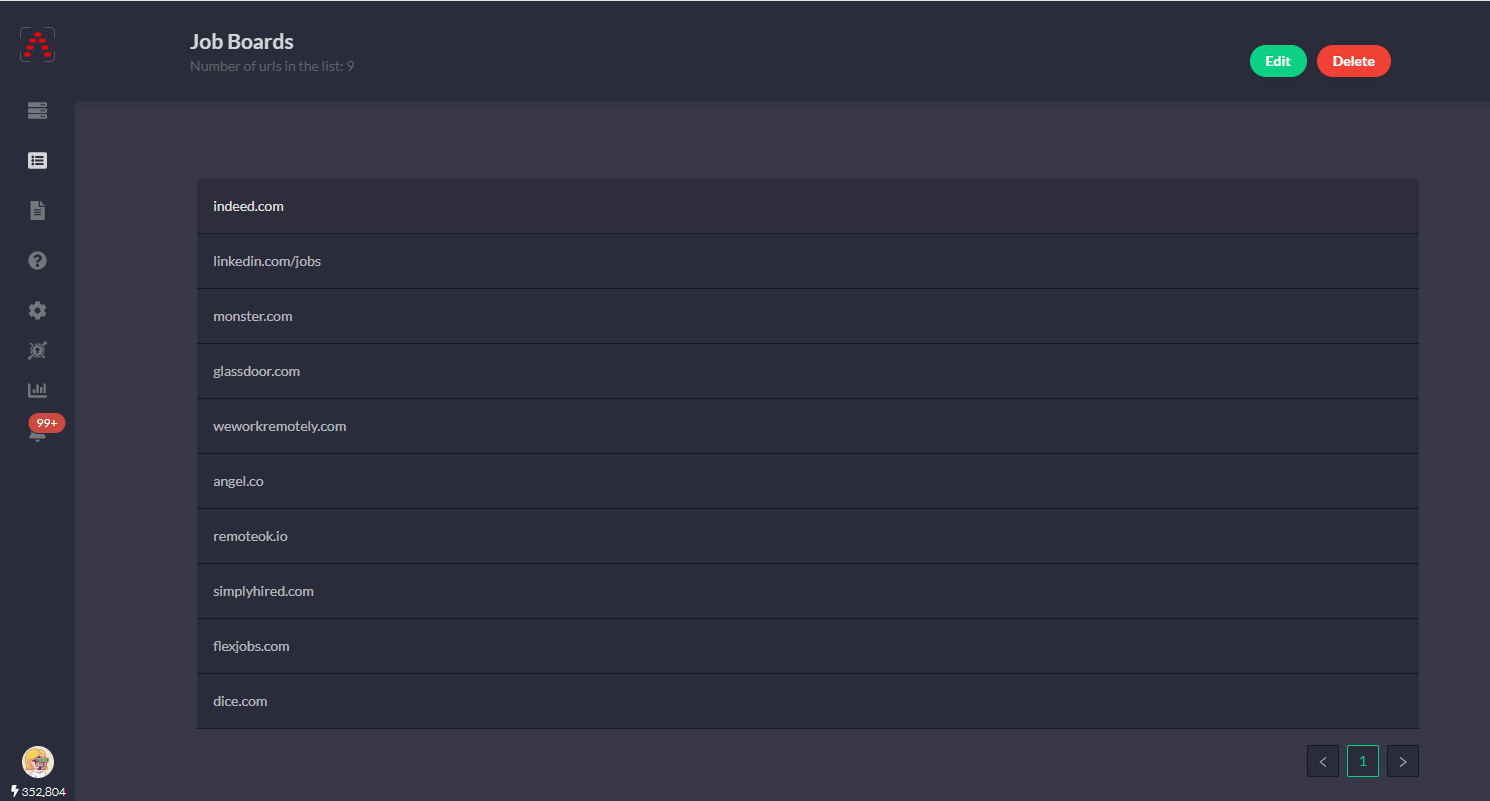
Click on any list to access its details. The list detail view provides:
- List Title: The name of the list for quick reference.
- Number of URLs: Displays how many URLs are stored in the list.
- Edit Options: Add, remove, or modify URLs directly within the list.
- Delete Option: Permanently remove the list if no longer needed.

How to Use Lists
Lists can be applied to instances for automations like scraping or performing URL-based tasks.
Follow these steps to use a list in your automation:
-
Set Data Type to Dynamic:
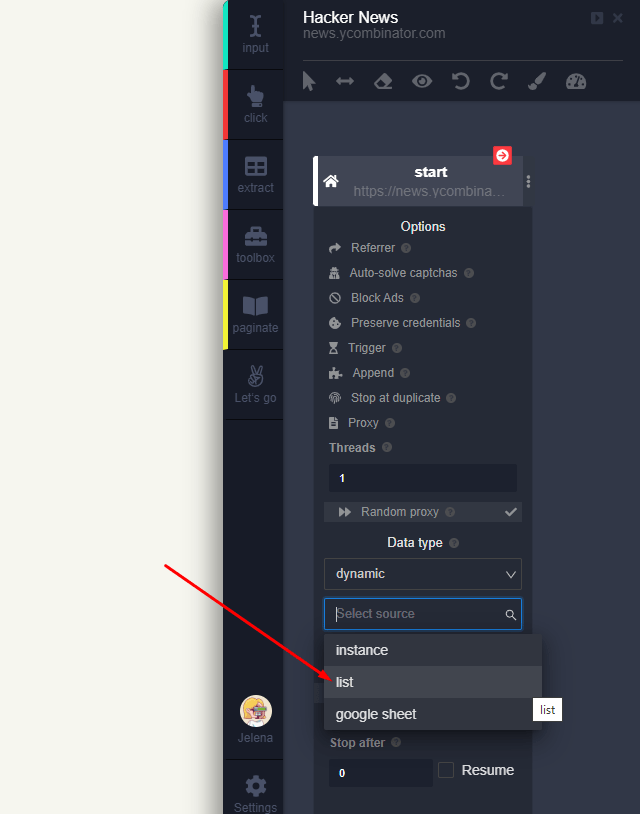
Open the Start Action in your instance setup and set the Data Type to Dynamic.
-
Select List as the Data Source:
In the Select Source dropdown menu, choose List as the data source.
-
Choose the Desired List:
From the available options, select the list you want to use for your task.
These steps will enable the bot to utilize the URLs stored in your selected list for its actions.

Best Practices for Managing Lists
- Use Clear Titles: Descriptive names make lists easy to locate and identify.
- Organize by Task: Group URLs according to specific tasks or projects.
- Keep Lists Updated: Regularly review and update lists to ensure relevance and accuracy.
What’s Next?
Dive deeper into Templates to save reusable setups for your automation tasks!